LED gel polish
About gel polish
Gel polish, also known as UV gel polish, or LED gel polish, is an upgraded gel polish product that combines the benefits of phototherapy. It has rapidly gained popularity in the global nail art market over the past two years. The birth of gel polish stems from a profound desire. When applying gel polish at a nail salon, customers are most concerned about drying speed and longevity. These two issues, despite having been around for over a century, gel polish products have struggled to guarantee. As this demand grew, gel polish emerged.  This new manicure method has the characteristics of low odor, environmental protection, and health. It also has high gloss and rich colors that conventional gel polish cannot match. It has better durability, easier operation, and more convenient and diverse design of nail patterns than conventional gel polish.
  gel polish is generally divided into three parts: base coat, color coat, and top coat. Compared to traditional gel polish, it offers advantages such as being solvent-free, low-irritation, low-odor, fast-curing, bright and transparent, and durable. Its ease of use makes it a popular choice among nail art professionals. With the advancement of gel polish products, one-step products have emerged, combining the functions of base coat, color coat, and top coat into one. However, these products are still relatively mature and leave much room for improvement. gel polish Light Sources gel polish is typically cured using traditional UV lamps or LED lamps. LED lamps are characterized by heat generation, skin-friendly properties, and faster curing times, but they are more expensive. Conventional UV lamps, however, emit a significant portion of the light spectrum that cannot be utilized (such as visible light and infrared radiation), resulting in a slight increase in heat generation and skin damage during curing. Their lower energy efficiency also results in longer curing times than LED lamps, but they offer a price advantage. Conventional UV lamps typically use 36 watts of power, while LED lamps typically use 12 watts. With the development of the nail art market, hybrid UV and LED lamps are now the most popular, typically using 36 watts of power, combining the advantages of both UV and LED lamps.
 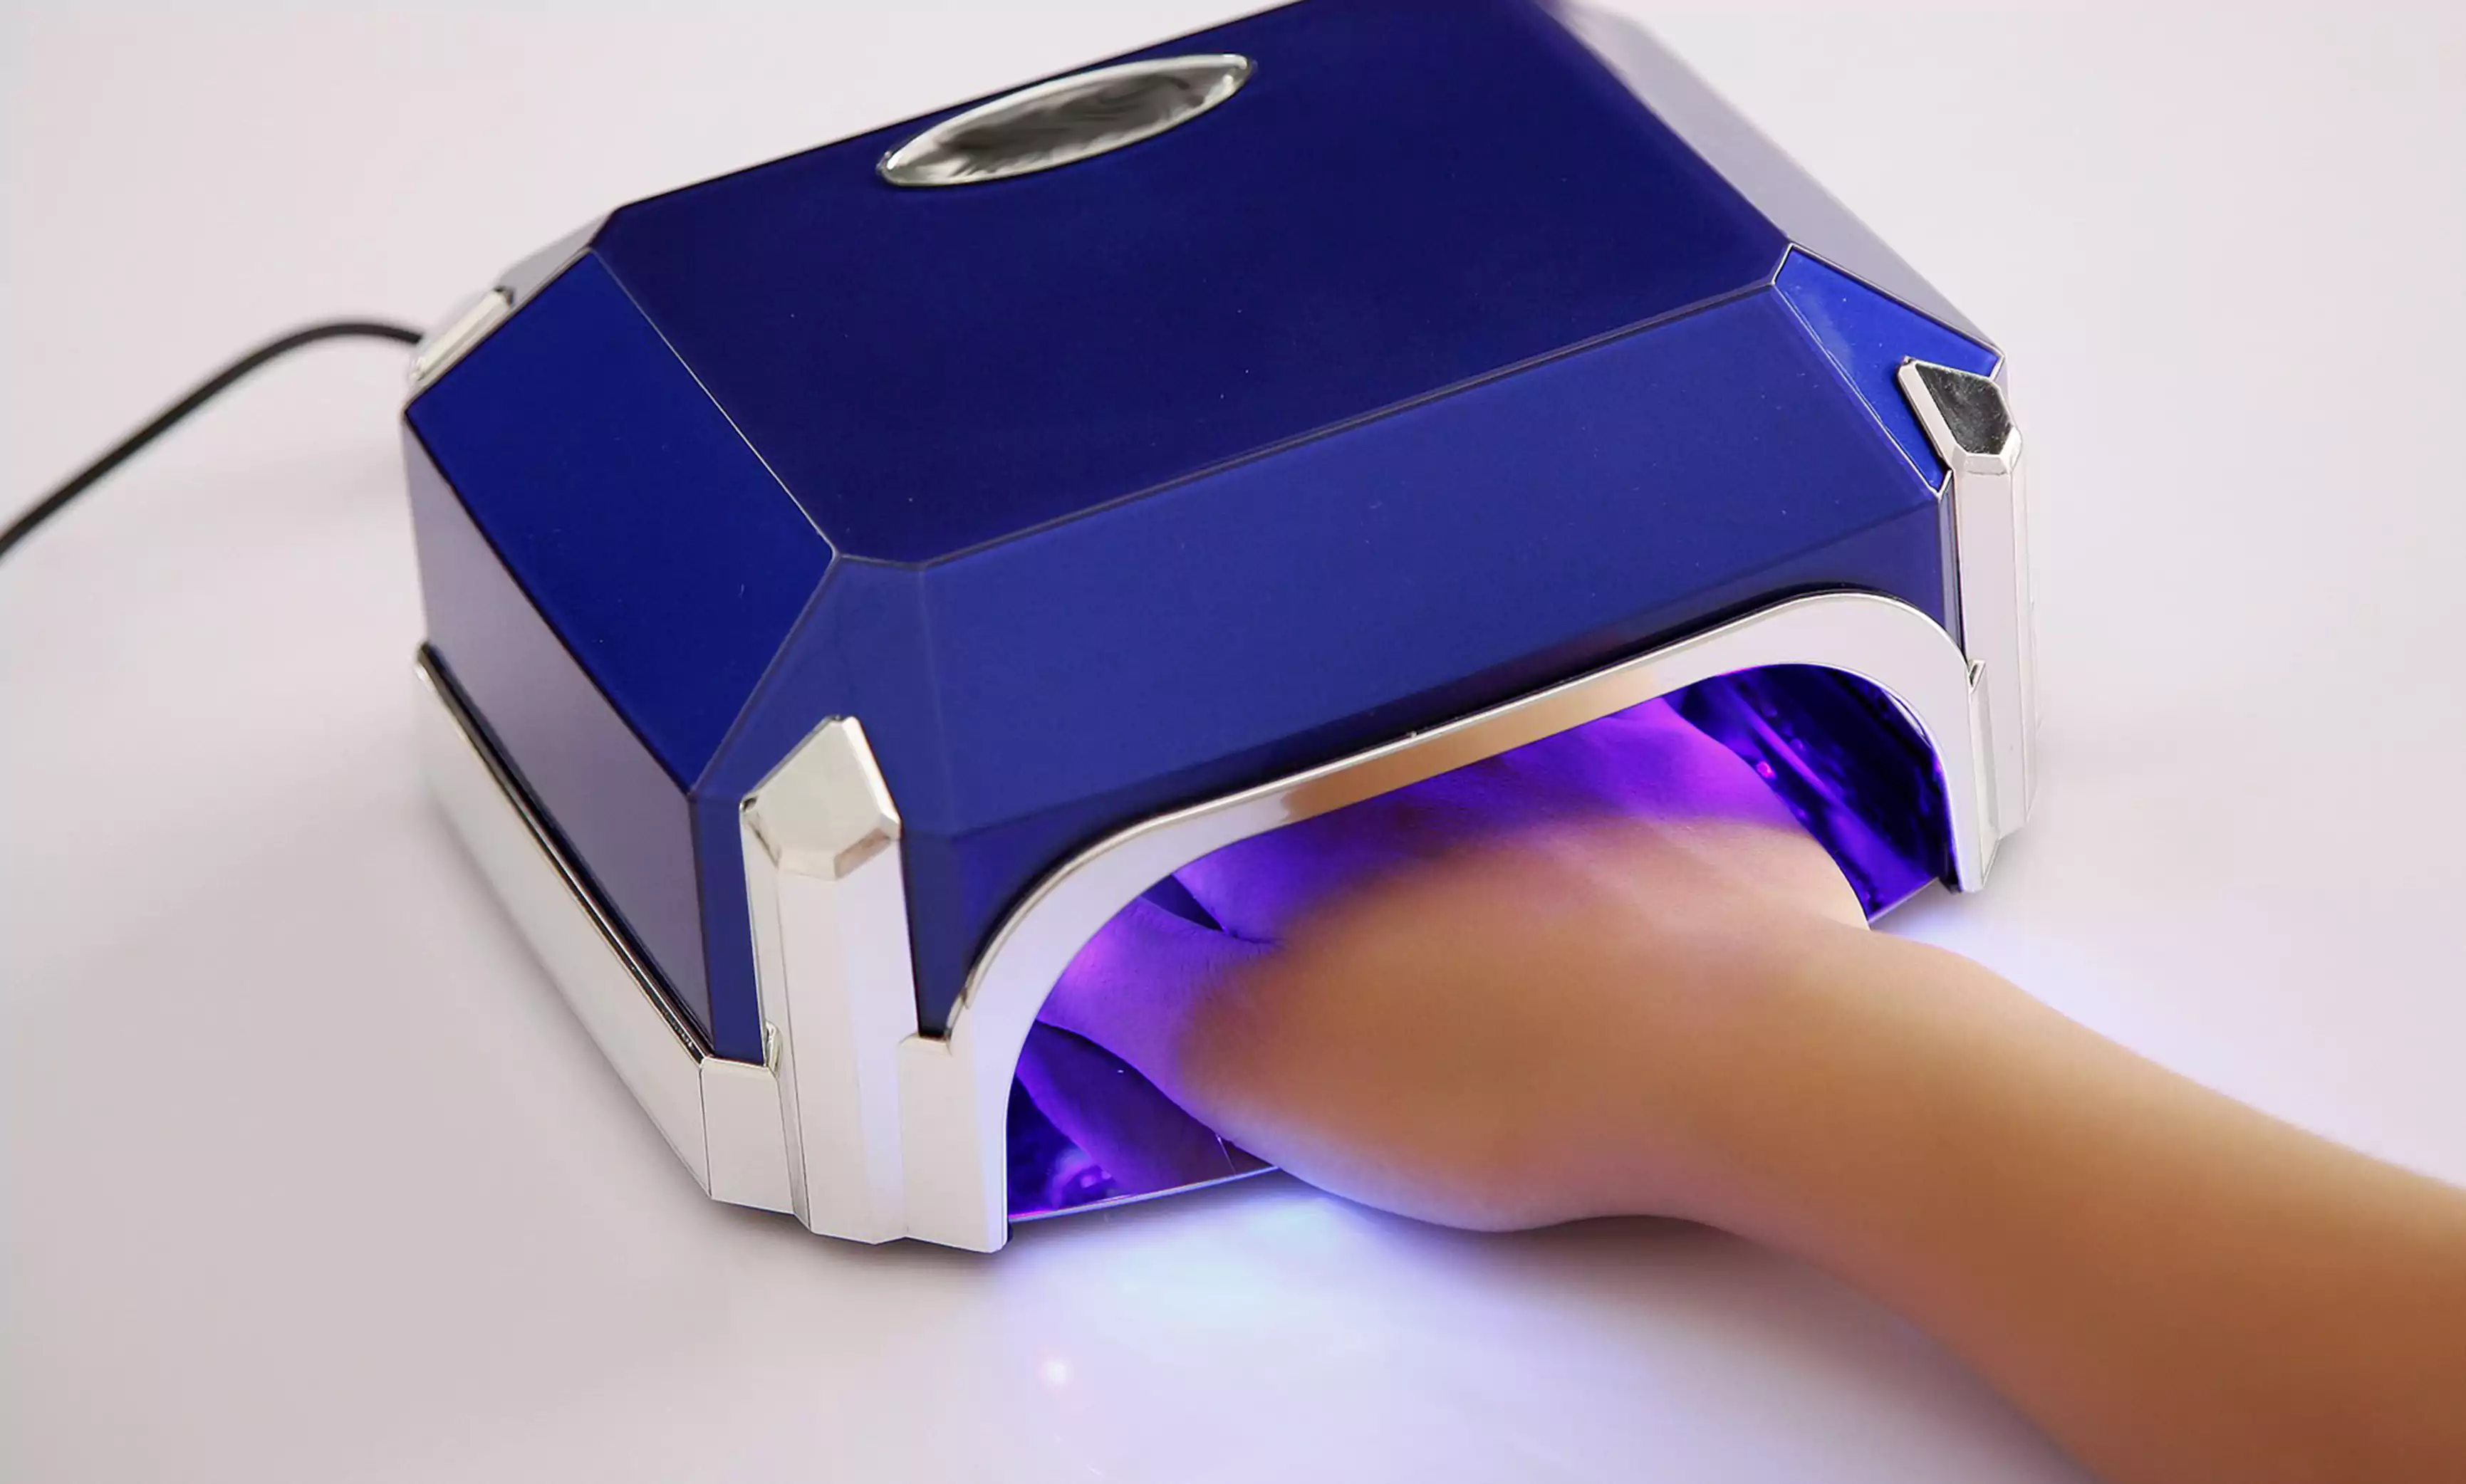 Power comparison and curing time of various nail art lamps
|
Ordinary UV lamp |
LED lamp |
UV/LED lamp |
||||
| Power | 18 W | 36W | 9W | 12W | 18W | 36W |
| Base Coat | 150S | 120S | 45S | 30S | 45S | 30S |
| Color Coat | 150S | 120S | 45S | 30S | 45S | 30S |
| Top Coat | 200S | 180S | 45S | 40S | 45S | 40S |
gel polish Process Introduction
gel polish Application Process 1) Manicure 2) Exfoliate 3) Scrape off dead skin 4) Buff the nail surface 5) Remove dust 6) Apply balancing solution (Balancing solution is the same type of product as quick-drying water and nail gel remover, used to remove oil and grease from the nail surface). No lamp is required. 7) Apply base coat (Apply a thin layer of base coat. Too thick a layer of base coat can cause shrinkage or wrinkling, resulting in uneven application of the polish. Avoid applying to the edges of the nail, leaving a 0.8mm gap. Otherwise, the polish may lift and peel.) 8) Apply base coat under a lamp (The duration of the lamp application depends on the light therapy lamp. It doesn’t matter if the surface is not dry. Do not touch it with your hands and proceed to the next step.) 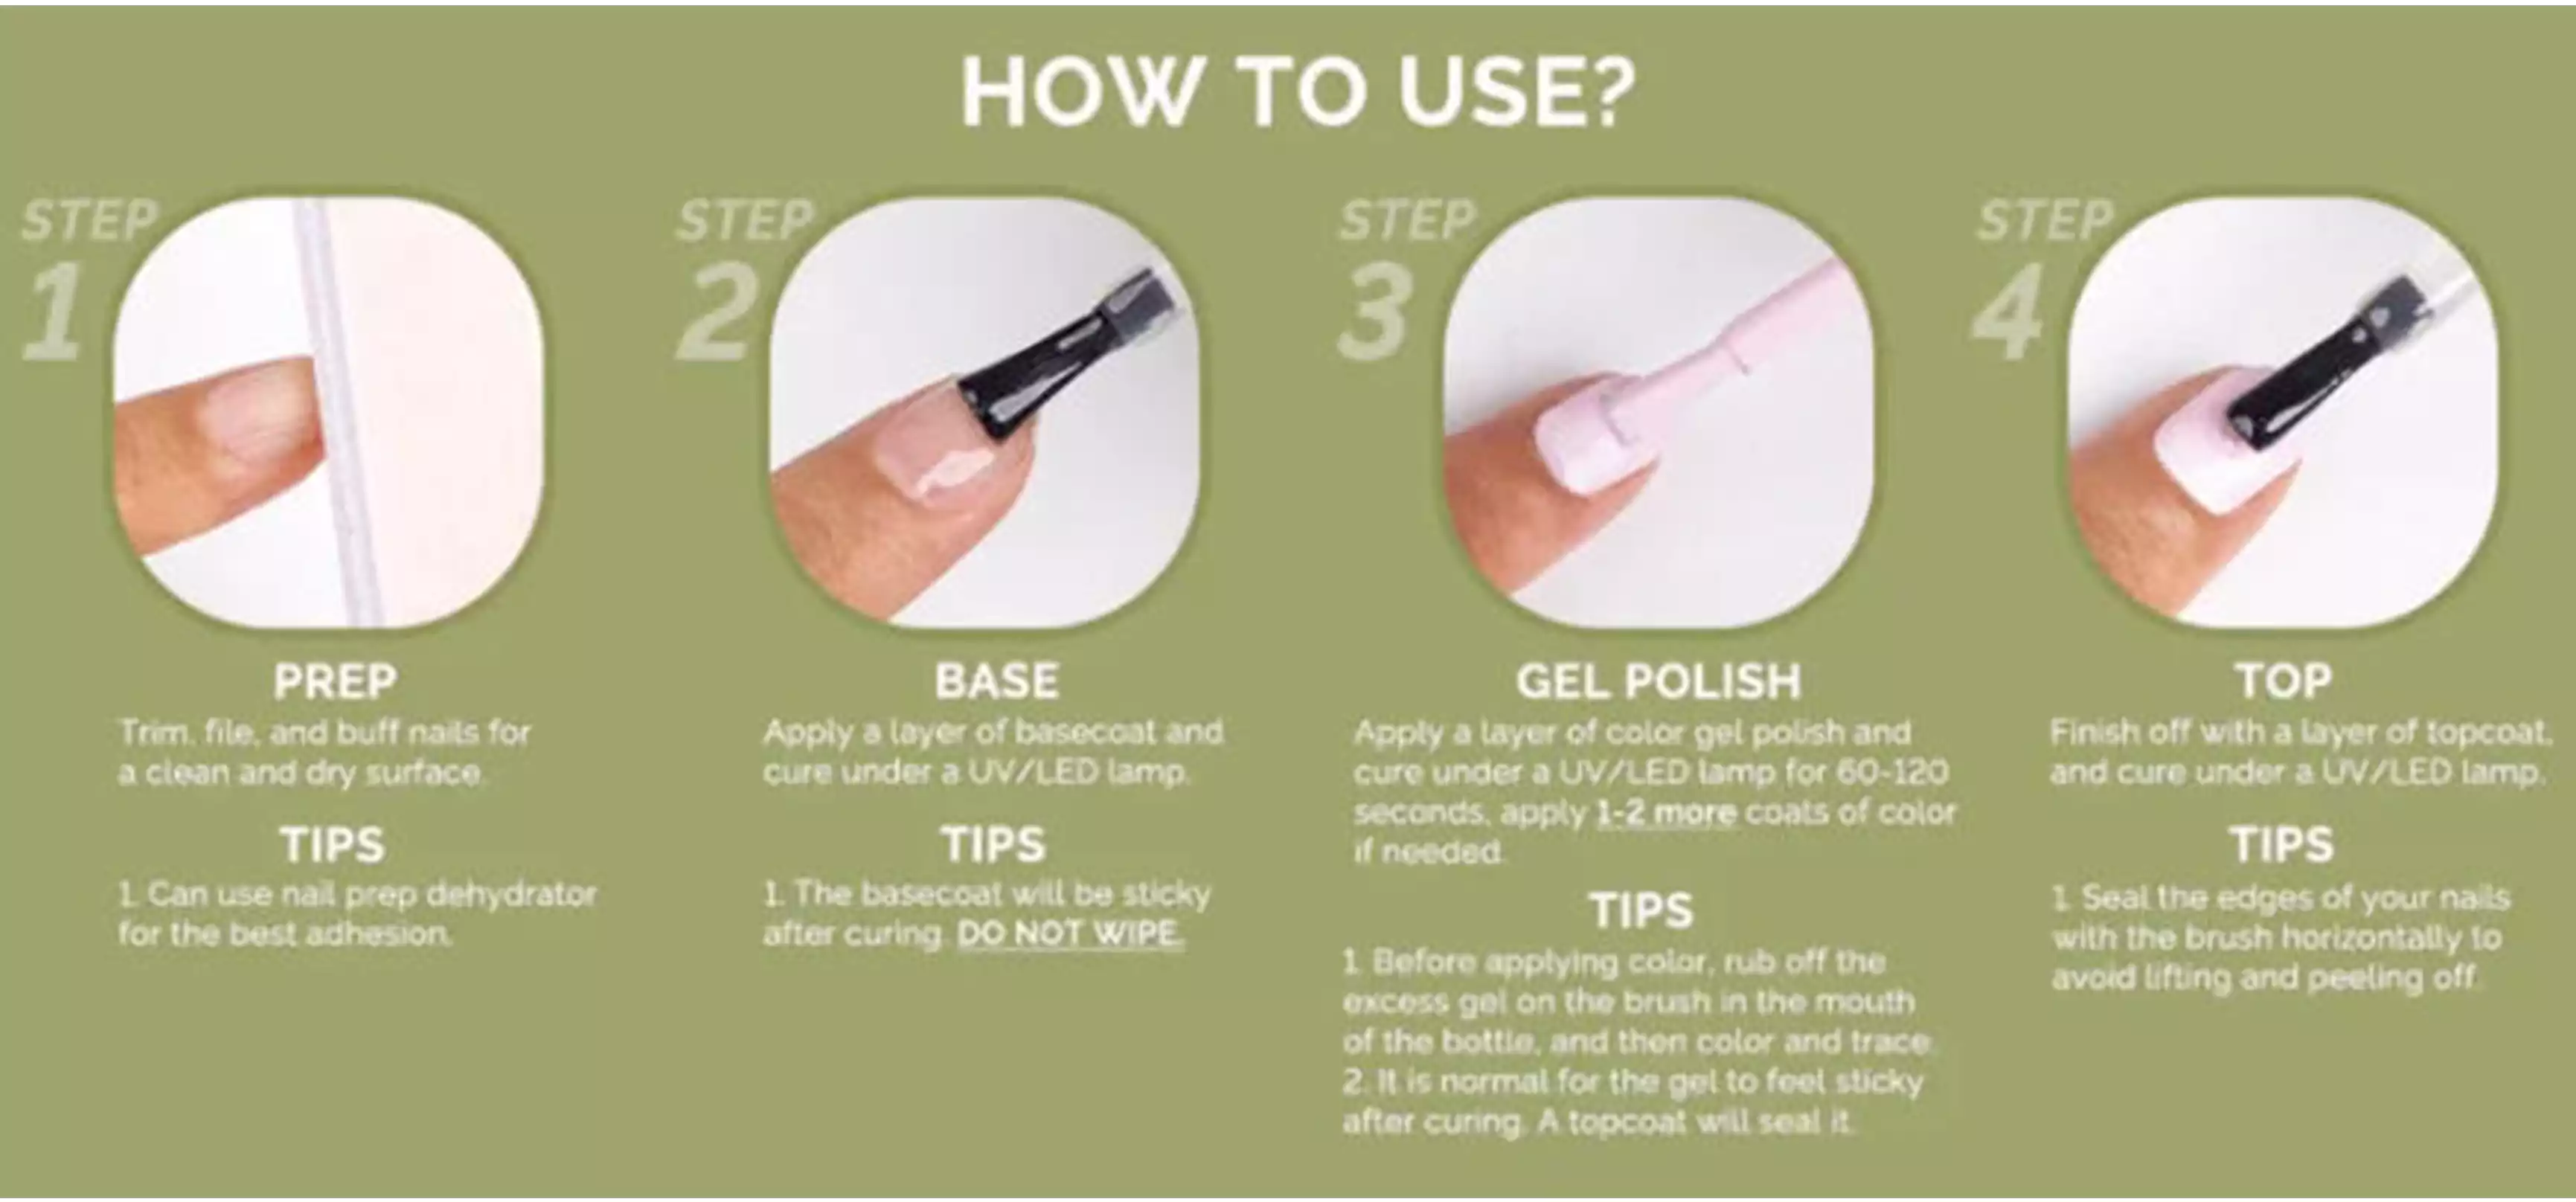 9) Apply color glue (Apply a thin layer of color glue. Avoid applying it to the edges of the nail, leaving a 0.8mm gap. Wrap the front of the nail in place to prevent peeling and flaking.) 10) Apply the color glue with a lamp (The exposure time depends on the light therapy lamp.) 11) Repeat steps 9-10 2-3 times (to achieve a richer color). 12) Apply a top coat (Avoid applying it to the edges of the nail, leaving a 0.8mm gap to prevent peeling and flaking.) 13) Apply the top coat with a lamp (The exposure time depends on the light therapy lamp. Some top coats can be applied twice.) 14) Remove the top coat (Use a gel polish remover pad dipped in quick-drying gel to wipe the top coat off).
gel polish Removal Process
- Applying gel polishremover (use a cotton pad to apply a generous amount of remover to the nail surface)
- Wrapping with tinfoil (wrap the nail tightly with tinfoil to prevent air leaks and wait for 15 minutes)
- Removing the polish (use clippers to remove the polish)
Physical Requirements for gel polish
- Base coats must have excellent adhesion to the nail and last for 20-30 days. They must be non-yellowing, odorless, have good leveling and wetting properties, be recoatable, non-hot, and low-irritation.
- Color coats (for color addition) must have good pigment wetting, fast curing, no yellowing, no odor, no shrinkage, good recoatability, no hotness, and excellent flexibility.
- Topcoats come in two types: wipe-on sealers and no-clean sealers. Wipe-on sealers have an oily surface after curing, but dry clean with alcohol wipes and have a high gloss. No-clean sealers require a dry, smooth surface. Both types of sealers must have excellent leveling and fullness, be non-yellowing, non-hot, have a smooth surface, a long-lasting gloss, and be hot and cold water resistant and scratch-resistant.
gel polish Brand Introduction Starting September 1st, the EU will only allow the use of TPO-free gel polish. While these names may sound unfamiliar to the average consumer, they may be familiar to manicurists and salon professionals. These chemical ingredients are commonly found in gel and semi-permanent gel polishes, primarily enhancing adhesion and hardness, and aiding in curing under UV light. TPO has been reclassified by the European Chemicals Agency (ECHA) as “Category 1B” due to research showing it may be toxic to human reproduction. Therefore, for your own safety and health, it’s best to purchase gel polish labeled TPO-free. CHROMÉCLAIR Hema Free gel polish is safe, hypoallergenic, environmentally friendly, and free of harmful ingredients (HEMA-free and TPO-free), ensuring a safe and secure user experience for every consumer.
You can also watch other nail art tutorials!
Get a space manicure At-Home Manicure in 4 Easy Steps
How to Do the Purple leopard print nail art at Home?